When you absorb and learn a good amount of the art fundamentals, you can start to manipulate and create art with more precision, stepping aside from the realism and going towards whatever your mind and imagination wants to create. It’s like, the image of the art you want to create in your mind becomes very close to the final one you physically produce. Just a reminder, I am not the owner of the characters present on this painting, this is a fanart, my goal is for studying, showing my art skills to others and also showing my affections for the characters.
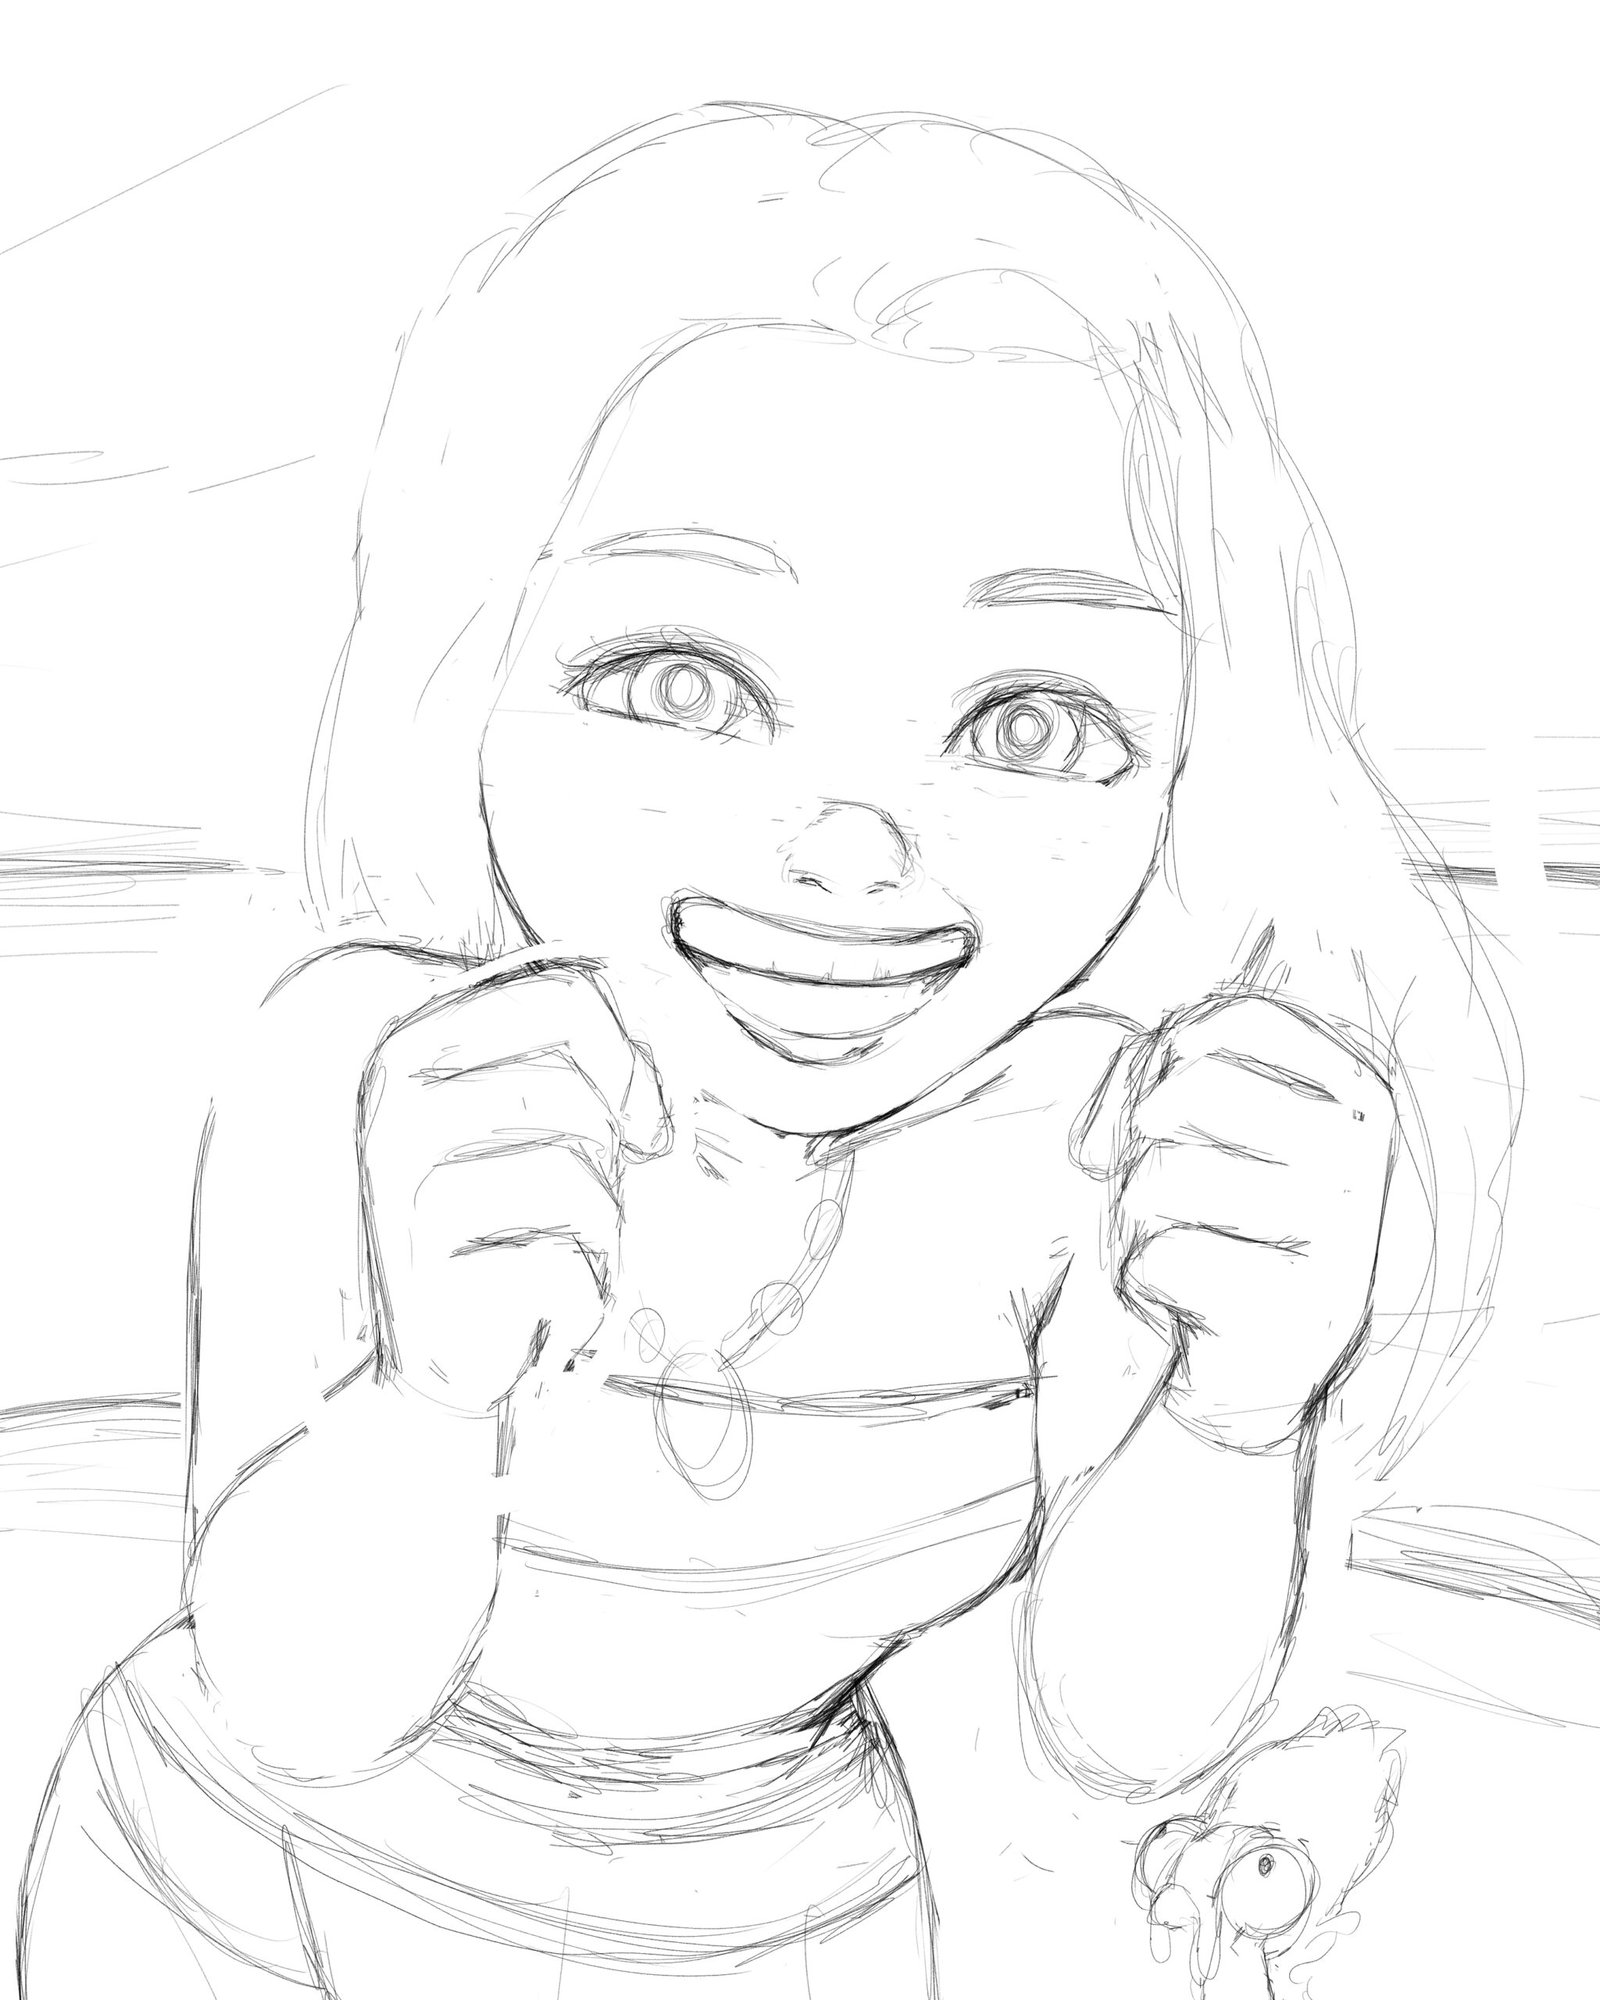
As I always do, first step is a nice sketch that is going to guide me through the whole art piece.
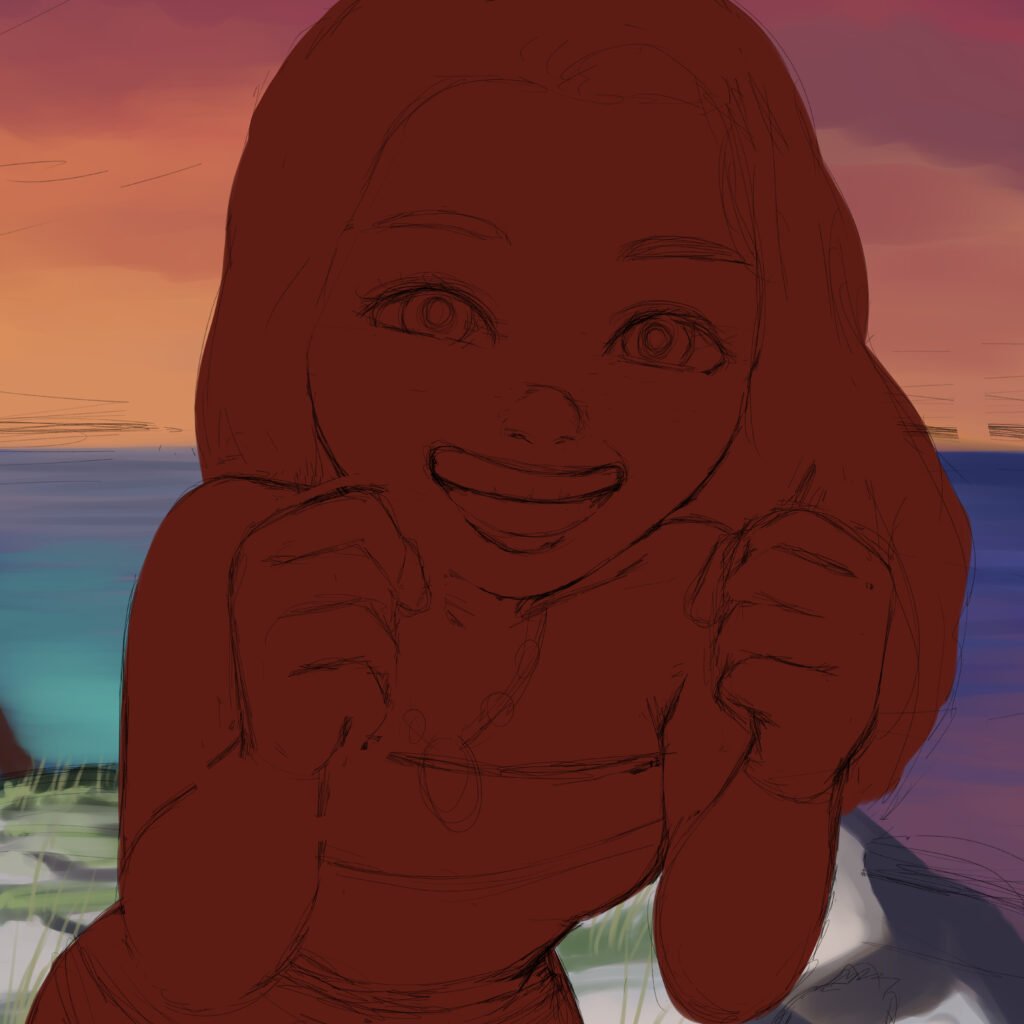
So, if you remember from the anime style explanation, I am going to create a flat base color layer to be clipped. Here, since I don’t have a lineart layer, I can’t use the magic wand tool on my sketch layer, since the lines are very messy and the wand tool won’t work well. So to make it happen, I use my lasso editing tool and select the edge of my sketch. When it is selected, I pick the fill tool and fill it with my color of choice. Which color I pick? Usually I go for the mid color skin of the character, so that way it makes it easier to visualize, at least for me, the shading areas and the highlights I am going to paint on the rendering section.

All right, for the first stage of rendering the artwork, I added some basic colors for her, based on the reference pictures I looked from Moana and painted some shades and bright areas just to have an idea of how it would look. So, for this painting, I only looked for references to have an idea of her features, but I didn’t have any references for the background, lights or her pose, so I had to do some experimentations here. One thing that really helps me to find the “atmosphere” from my paintings, is actually painting the background or at least the base colors for the background first. With that, I can find the colors I am trying to imagine for her easier, since some of the colors on her must reflect her surroundings, to make the “atmosphere” work and looking like she belongs there.
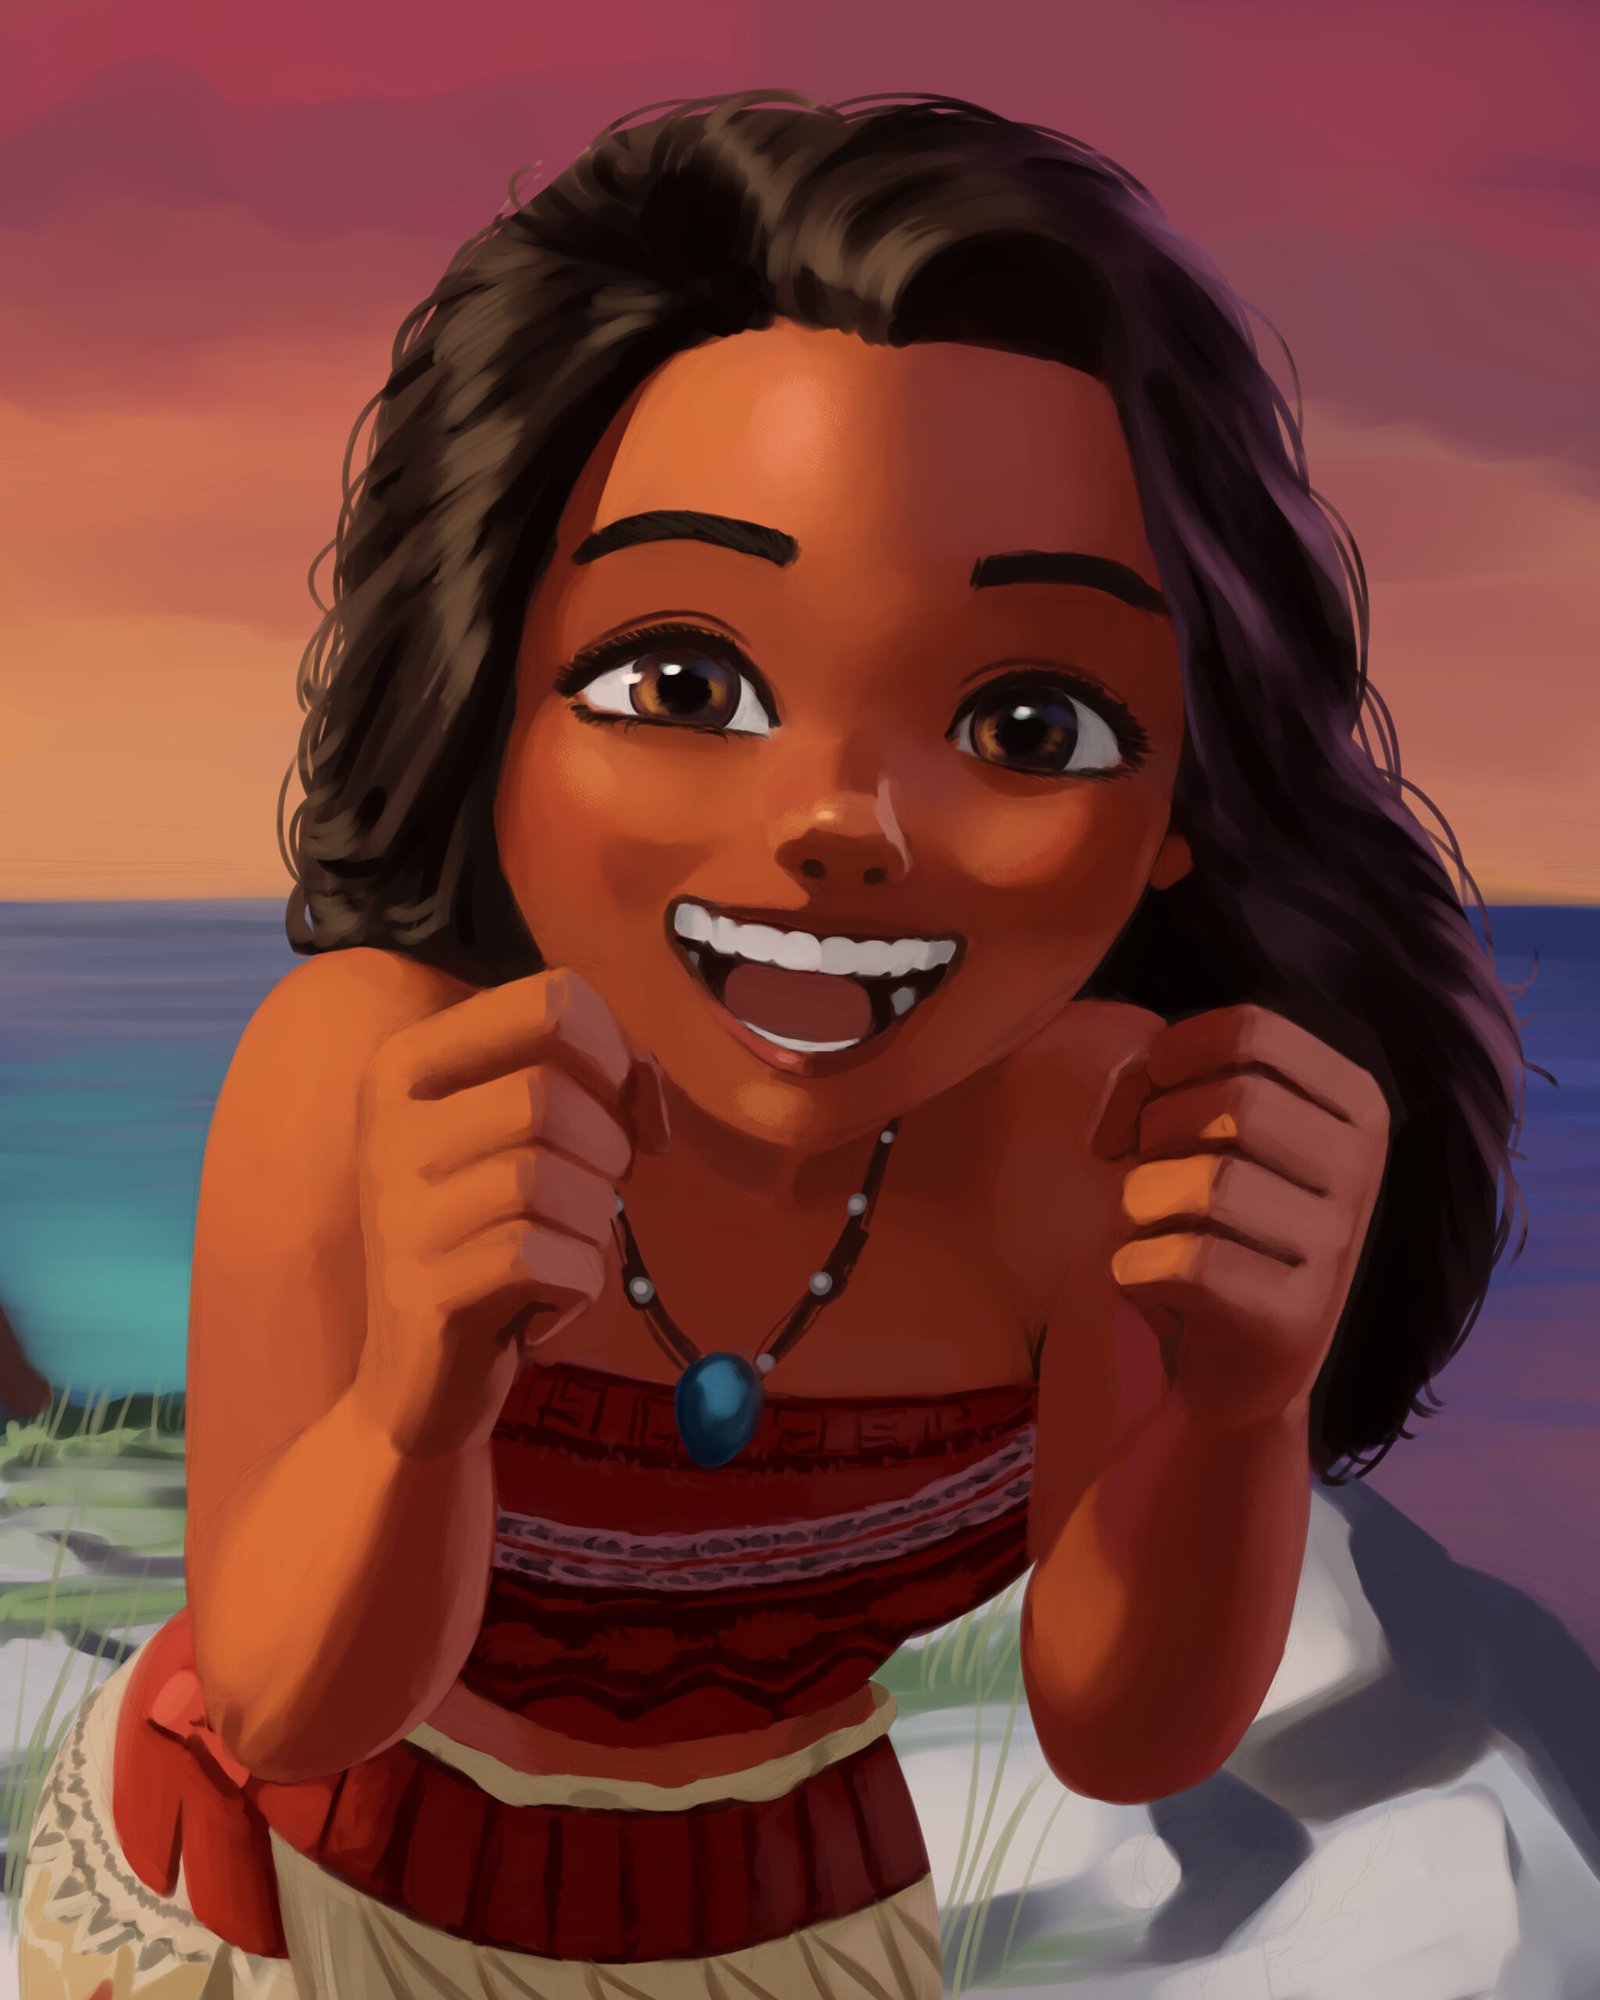
First thing, don’t worry, hei hei is fine, he isn’t here yet, but he will be on the final art piece. Second, between the last section and this one, a lot changed, basically because I forgot to create more layers to show more of my art. Since I paint characters in one single layer, I often forget to duplicate this layer in case I need to show my art process. So, sorry about that. Simplifying how I painted, I used the round mixing brush and added values. After that, I used a smudge tool and smoothed the edges where the colors connect. It’s very important to know where you want the colors to be more blended and mixed, and where you want it more harsh and visible. After repeating this process until it looks good to me, I add highlights to areas where light reflects more, like eyes, nose, mouth, hair, jewelry, some areas of her skin and even fabric depending on the material.
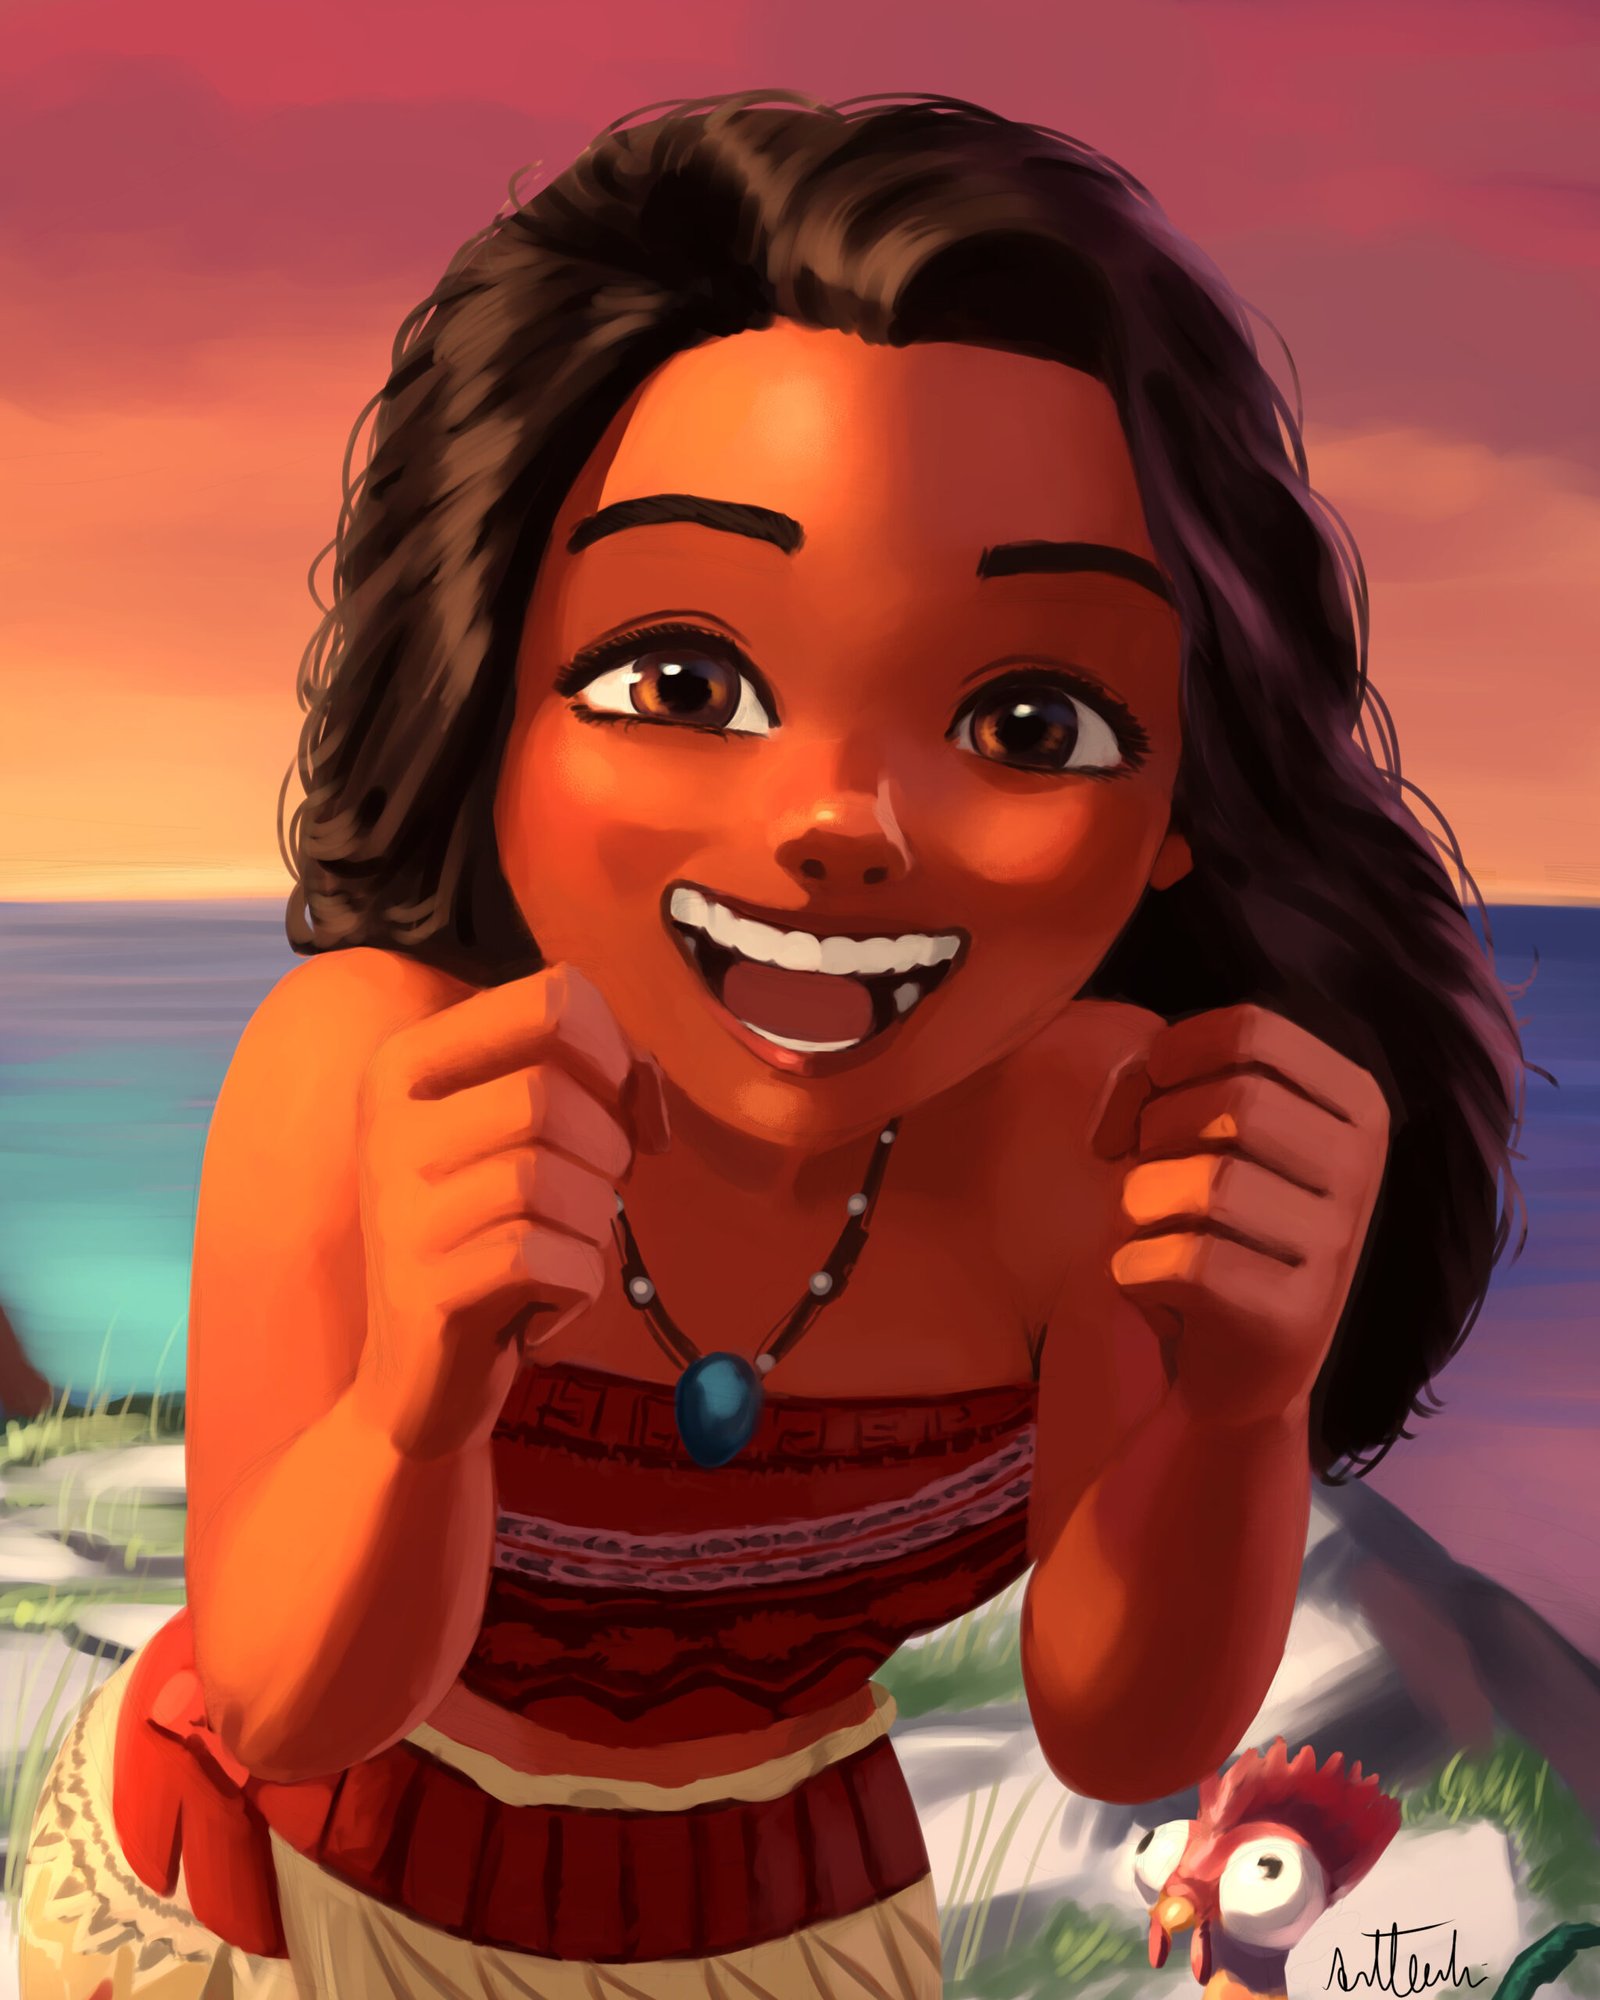
For the final step, I painted hei hei, yeey. I fixed some areas of her using the liquify tool, like her smile, I wanted it wider, and the liquify tool is really good when you want to make slight changes without repainting it, definitely saves time. I also created a glow dodge orangish blending layer on top of my normal layer to make her skin shine a little bit more, making it look like the warm sun is hitting her face. After all that, I signed and another art piece is complete.
